Rubber & Vinyl Products – Installation Instructions
Rubber Tile and Sheet Flooring
Products
- Architectural SD Rubber
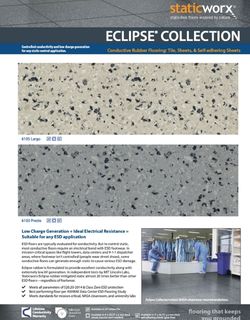
- Eclipse Electrically Conductive EC – and GF (glue free) – Rubber
- Eclipse Glue-Free (GF) Rubber
- StatLock Interlocking Static Dissipative (SD) Rubber Tiles
- Aisle-Safe SD and EC Rubber Runners & Mats
Information
- Advantages of Electrically Conductive (EC) Rubber
- Cleanrooms & Labs: Why We Love This ESD Flooring System
- Don’t Choose Your Floor Until You Understand The Role of Footwear
- Seam Welding for Cleanrooms
Installation, Cleaning, Sustainability
1. Handling & Storage
Material Checklist
- Check deliveries for compliance with orders.
- Do not mix different batches of a color within the same area.
- StaticWorx flooring products, all adhesives, and accessories must be site conditioned at room temperature for two (2) days prior to installation. Temperature shall be 68°F + 5°F and maintained for 48 hours before installation, during installation, and 72 hours after installation.
- Store off ground in a weather-tight enclosure.
- Do not stack pallets.
- StaticWorx flooring tiles are packed back-to-back, face-to-face. Always handle in this manner.
- Do not stack boxes more than 20 high.
- StaticWorx rolls should be stored standing on end and secured to prevent falling. Store rolls so that the labels are facing up to ensure they can be easily read.
2. Subfloor Recommendations
A. Subfloor Grade Levels
IMPORTANT NOTE: Moisture testing as per ASTM F 1869 and/or ASTM F 2170 is mandatory.
The following example displays the three types of subfloor grade levels:
Above Grade – An acceptable above grade floor is a concrete or wood substrate.
Suspended – An acceptable suspended floor is a concrete or wood substrate with a minimum of 18” (460mm) of well-ventilated air space below. It is recommended that an effective moisture vapor retarder be placed upon the ground beneath the air space.
On Grade – An acceptable on grade floor is a concrete substrate partially or completely in contact with the ground. Properly constructed, the concrete slab will be suitably protected from moisture penetration by planned water drainage and incorporated an effective moisture vapor retarder.
Below Grade – An acceptable below grade floor is a concrete substrate in direct contact with the ground. Properly constructed, the concrete slab will be suitably protected from moisture penetration by planned water drainage and incorporated an effective moisture vapor retarder.
The following example displays the three types of subfloor grade levels:
Above Grade – An acceptable above grade floor is a concrete or wood substrate. Suspended – An acceptable suspended floor is a concrete or wood substrate with a minimum of 18” (460mm) of well-ventilated air space below. It is recommended that an effective moisture vapor retarder be placed upon the ground beneath the air space.
On Grade – An acceptable on grade floor is a concrete substrate partially or completely in contact with the ground. Properly constructed, the concrete slab will be suitably prot ected from moisture penetration by planned water drainage and incorporated an effective moisture vapor retarder.
Below Grade – An acceptable below grade floor is a concrete substrate in direct contact with the ground. Properly constructed, the concrete slab will be suitably protected from moisture penetration by planned water drainage and incorporated an effective moisture vapor retarder.
B. Wood Subfloor Recommendations
Types of Wood Subfloors
Single Plywood – This type of subfloor construction shall be installed according to EWA “Engineered Wood Association” (formerly the APA) specifications. EWA underlayment GRADE plywood shall be used and installed according to EWA recommendations.
NOTE: Not recommended wood subfloors: tempered hardboard, untempered hardboard, particle board, wafer board, strand board, fire retarded plywood and board.
Precautions - Wood Subfloors
StaticWorx rubber flooring shall not be laid on wood subfloors that are directly in contact with concrete subfloors on or below grade, even if built on sleepers. All suspended wood floors should have adequate under floor ventilation. It is recommended that an effective moisture vapor retarder be placed on the ground beneath the air space.
Preparation
- If an underlayment is not used, the surface of the suspended wood floor shall be clean from paint, wax, varnish, oil or old adhesive.
- If you want to install an underlayment over a floor with paint, wax, varnish, oil or old adhesive, a layer of 10 mil polyethylene sheeting shall be installed between the subfloor and the new underlayment being installed.
- All floors shall be prepared for smoothness by sanding.
- All nails shall be countersunk or removed.
- Loose boards shall be nailed down or removed and replaced.
- All gaps and uneven places shall be filled.
NOTE: All responsibility for warranties and performance rests with the plywood manufacturer.
C. Concrete Subfloor Recommendations
Types of Concrete Subfloors
Many different types of concrete subfloors exist, the only recommended concrete subfloor is American Concrete Institute “ACI” 302 Class 4, 5, & 6. Light weight concrete, less than 115 lb/ft3 (1841 kg/m3), may have such low strength that it is unsuitable for covering with resilient flooring unless 1 in. (25 mm) or more of standard weight concrete, generally 140 lb/ft3 (2241 kg/m3) or more, is used as a topping.
NOTE: Light weight concrete can take a lot longer to try.
A permanent effective vapor retarder with a low permanence (less than 0.1) having a minimum thickness of 10 mils (ACI 302), shall be placed directly underneath the concrete slab.

Precautions - Concrete Subfloors
The slab temperature of concrete subfloors shall be between 68°F + 5°F. Slab temperature is critical to the set-up time of adhesive. A slab temperature below 68°F will slow down the initial tack of the adhesive, making it necessary to re-roll the flooring at 60 minutes, and again at 90 minutes. A slab temperature above 75°F will increase the initial tack of the adhesive, making it necessary to re-roll the flooring within 30-45 minutes rather than the recommended 60 minutes.
An acceptable concrete subfloor shall also meet the following requirements:
- All concrete subfloors shall be dry, clean, smooth and structurally sound.
Subfloors shall be tested using both of the following methods:
- Testing for moisture using a Humidity Probe and Digital Meter (ASTM F 2170 Standard Test Method for Determining Relative Humidity in Concrete Floor Slabs Using in situ Probes) will require 3 tests for the first 1,000 sq. ft., and at least one additional test for each 1,000 sq. ft. thereafter. Maximum allowable reading shall be 75% RH.
- Testing for moisture using a Calcium Chloride test kit (ASTM F 1869 Standard Test Method for Measuring Vapour Emission Rate of Concrete Subfloor Using Anhydrous Calcium Chloride) will require 3 tests for the first 1,000 sq. ft. and at least one additional test for each 1,000 sq. ft. thereafter. Maximum allowable reading shall be 3 lbs. per 1,000 sq. ft. Contact StaticWorx for Calcium Chloride Test kits.
- An on or below grade concrete floor shall have an effective moisture vapor retarder, according to industry standards. If no moisture vapor retarder is present, then one must be installed. Contact StaticWorx for information.
- The concrete subfloor must be flat to a tolerance of 3/16” in ten linear feet.
- All steel troweled (slick) finished concrete floors need to be properly roughened up (using Blastrac, Diamond Grinder-vac or similar mechanical equipment) to ensure adhesion.


Preparation
- If an underlayment is not used, the surface of the suspended wood floor shall be clean from paint, wax, varnish, oil or old adhesive.
- If you want to install an underlayment over a floor with paint, wax, varnish, oil or old adhesive, a layer of 10 mil polyethylene sheeting shall be installed between the subfloor and the new underlayment being installed.
- All floors shall be prepared for smoothness by sanding.
- All nails shall be countersunk or removed.
- Loose boards shall be nailed down or removed and replaced.
- All gaps and uneven places shall be filled.
WARNING! Materials should not be installed over building expansion joints.
NOTE: The aforementioned recommendations concern only the bonding characteristics of StaticWorx flooring products to concrete subfloors. The performance of the subfloors should be established according to industry standards (American Concrete Institute “ACI” 302 Class 4, 5 & 6).
Underlayment (Leveling Compounds)
If the subfloor surface is noticeably uneven or out of level, then it should be properly leveled by an experienced underlayment contractor. The leveling materials must be portland cement based and should provide a minimum 3,500 PSI compressive strength (ASTM C 109) and sufficient bond to existing subfloor surface (i.e. Ardex, Laticrete, Duralox, Mapei, or equivalent) and shall be installed as per the manufacturer’s instructions.
Preparation
All concrete subfloors shall be prepared according to ASTM F 710 Standard Practice for Preparing Concrete Floors to Receive Resilient Flooring.
- Patching cracks, depressions, and concrete control joints should be thoroughly cleaned and filled using StaticWorx PU adhesive, or one of the above mentioned underlayment (leveling compound) according to the manufacturer's specifications.
- Concrete floors shall be dry, clean, smooth, level, and structurally sound. They should be free of dust, solvent, paint, wax, oil, grease, asphalt, sealing compounds, old adhesive, and other extraneous materials.
- All curing, hardening, and bond breaking compounds must be removed. Only mechanical methods for removal are acceptable (i.e. Blastrac, Grinder-Vac or similar equipment). Do not use chemicals for removal.
- Do not use wax or oil based sweeping compounds.
Adhesive Bond Test
This is recommended to determine the compatibility of the adhesive to the pre-prepared subfloor and can be a useful indicator if the moisture results are marginal. Use the specified approximately 50′ apart throughout the area. Areas next to walls or other light traffic areas should be selected for the bond test. Tape down the perimeter of the flooring to prevent drying of the adhesive at the edges. After a minimum period of 72 hours the flooring should be pulled from the subfloor. If an unusual amount of force is required, the bond could be considered sufficient.
NOTE: If the subfloor is radiant heated, contact StaticWorx, Inc. for correct installation recommendations.
D. Steel Subfloor Recommendations
For information about acceptability and preparation of steel subfloors, please contact StaticWorx, Inc. Technical Department at 617-923-2000.
E. Existing Subfloor Recommendations
Permanent Floor Finishes
Terrazzo, Quarry Tile, Ceramic Tiles, Marble
Types of Bonding Agents
- Mud Cement Setting – This is a suitable bonding agent for permanent floors. Application may be made over such a subfloor.
- Epoxy & Urethane Coatings – This can be a suitable subfloor. The bond must be carefully checked. Look for loose areas and check for proper bond. If an Epoxy coating has failed, please contact StaticWorx, Inc.
- Thin Set – This is not a suitable bonding agent. Remove tiles and clean the surface.
Preparation
- All glazed or uneven ceramic tiles, quarry tile, terrazzo, marble, and epoxy or urethane coatings shall be Blastraced or sanded for a rough and level surface.
- All paint, wax, varnish, old adhesive, etc., shall be mechanically removed.
- All sealers and topical coatings shall be mechanically removed.
- An adhesive bond test should be performed, refer to “Concrete Subfloor Preparation.”
- Level all grout joints and depressions with 2-Part Acrylic adhesive or a proven underlayment, according to manufacturer’s specifications.
Non-Permanent Floor Surfaces
NOTE: These ARE NOT acceptable subfloors. They are not permanent, and bonding is difficult. Any installation over these floors becomes the responsibility of the owner. Vinyl Asbestos Tile (VAT), Vinyl Composition Tiles (VCT), Asphalt Tile, Vinyl Tile & Sheet Goods.
CAUTION: Existing floor covering may contain asbestos (federal, local and state restrictions shall be followed).
3. Adhesive Recommendations
| Flooring | Adhesive | Trowel Serration | Adhesive Coverage |
|---|---|---|---|
| StaticWorx Rubber & Vinyl | Pressure Sensitive | 1/16 x 1/16 x 1/16″ square-notch | 180-200 SF |
| Statbond | 1/16 x 1/16 x 1/16″ square-notch | 125-150 SF | |
| 2-Part Conductive Epoxy | Please contact StaticWorx | ||
Open Time
The open time will vary depending upon temperature, air flow and humidity.
Statbond adhesive should have a minimum of 10 minutes open time (square-notched). The ideal time to lay the flooring into the adhesive is best described as follows:
Semi-Wet The adhesive must be able to transfer to your finger tips with a light touch and just start to string while the core of the serrations remains wet (resulting in full adhesive
transfer).
NOTE: This method can only be used on a porous surface.
2-Part conductive epoxy adhesive should have a minimum of 20 minutes open time. The ideal time to lay the flooring into the adhesive is best described as follows:
When the adhesive first starts to tack-up or becomes sticky.
4. Installation Checklist
Before work is begun, every site should be inspected for items listed below.
Site Checklist
- Electricity for lights and power shall be available.
- Forklift service, if necessary, shall be provided.
- Proper ventilation shall be provided.
- In all instances, adequate temperature shall be maintained where the material is to be stored and installed - recommended 68°F + 5°F. This temperature shall be maintained for 48 hours before installation, during installation, and 72 hours after installation.
- All subfloor conditions must be checked and corrected as per aforementioned instructions.
Equipment Checklist
- StaticWorx adhesive (type and date)
- Knife/seam cutter (roll goods)
- Utility knife with straight blade (large hook blade, if required)
- Carpenter’s square
- Chalk line and chalk
- Tape measure
- 150 lb. roller
- Weights, if required
- Hand seam roller, if required
- Recommended adhesive trowel (see Adhesive Recommendations)
5. Sheet Goods Installation
Material Layout/Fitting for Sheet Goods
- Vacuum the prepared subfloor area to be installed.
- Unroll the StaticWorx EC products and allow to relax (lay flat) before cutting and fitting.
- Locate the center of each end wall and connect the points by snapping a chalk line down the middle of the room.
- With the room properly centered, you can relocate your lines for a convenient starting place, or just start in the center of the room.
- Take care in planning and fitting to make sure there is a minimum of waste. If installation is to be over a plywood surface, take care to prevent seams from coinciding with the joints of the plywood underneath.
- StaticWorx EC rolls have direction arrows printed on the back of the flooring. Install the rolls so that all arrows point in the same direction.
- Cut to size the required lengths and place them in position. All seams shall have a minimum 1 1/4” (1.25”) overlap.
- Be careful to ensure the tapered edge/uncut edge is underneath.
- Cut in the sides of the area using the scriber, suitable trimming tool, or free-hand. If preferred, you can also cut in the ends now, or after adhering.
- All seams are to be double-cut using one of the methods listed below. When cutting seams, bear in mind that all seams shall have a neat fit (do not pressure fit), regardless of whether the seams are to be welded or not. This shall be done before adhering to the subfloor.
CAUTION: If seams are not cut dry beforehand, peaked seams may occur from lack of adhesive due to removal of some adhesive with the tapered edge/waste.
NOTE: The flooring pattern does not always continuously flow into the tapered edge, so check before cutting to remove the tapered edge and be sure to maintain the correct flow of the flooring pattern.

To remove the tapered edge use one of the two methods above [under Section Method One (6a. or 6b.)].
Adhesive Application
WARNING!
Be prepared to protect the flooring during and after the installation from sun, moisture, and other construction trade (at least until adhesive has cured), if required, by covering 1-2 days with Masonite or plywood, insuring all joints are taped to prevent debris from becoming entrapped underneath and causing damage.
CAUTION: When spreading the adhesive (after the seams have been cut), it is vitally important that the material not move. If necessary, place weights on the material so that no movement will occur as you spread adhesive. Overlapping the adhesive may telegraph through the flooring.
Semi-Wet Method
- Uplift a workable area and vacuum the subfloor and back of the flooring to remove any debris, make sure your pants are free of any trash including leveling compound.
- Keeping a straight line of adhesive near the fold, apply the adhesive to the pre-prepared subfloor and allow the appropriate open time. Open time will be a minimum of 10 minutes (V-notched). Open times will vary according to air temperature, subfloor temperature, concrete porosity, humidity and air circulation. The adhesive must be able to transfer to your finger tips with a light touch and just start to string while the core of the serrations remains wet (resulting in full adhesive transfer). If the adhesive is dry to the touch, do not install the flooring -remove and replace the adhesive.

- Carefully start to place the StaticWorx EC sheet goods into the adhesive and check that you have full adhesive transfer before continuing. Make sure the seams are together without stress (do not pressure or force seams together). Continue this process until the uplifted area is placed into the adhesive.
- If you have not already done so, cut in the ends of the adhered area using the free hand method or suitable trimming tool.
TOP TIP: Using carpet off-cuts and double sided tape, cover the roller to help ensure you remove all air pockets from any dips in the substrate, and avoid a punch list.
- Roll slowly with a 100 lb. roller. Roll first from the center out so air does not get trapped under the material, then roll lengthwise.
- Only if required, hand-roll the seam area gently with a hand roller to smooth seam. Do not press hard with hand roller.
- Only if required, apply weights to any lifting flooring until the adhesive has cured to insure a good bond.
- Repeat the procedure for the second half of this area.
- After one hour, re-roll the entire area in both directions with a 100 lb. roller
- Remove any fresh adhesive from the surface of the flooring with water and a damp clean cloth. Dried adhesive should be removed with rubbing alcohol.
- Repeat the process until all areas are completed.


Application Follow Up
- Permit no foot traffic for 6-12 hours.
- Permit no heavy foot traffic for 24 hours.
- Allow no heavy rolling loads for 72 hours, i.e. hospital beds, operating room tables, and/or similar equipment.
- Maintain recommended temperature (68°F ± 5°F) during adhesive curing time (72 hours).
- Avoid initial maintenance of finished floor for 72 hours to allow adhesive to fully cure.
6. Tile Installation
NOTE: Material layout should be decided by Architect, Designer, or end user. However, we recommend the tiles are installed point to point (corner to corner).
Material Layout/Fitting for Sheet Goods
- The dry laying method is recommended. Locate the center of each end wall and connect these points by snapping a chalk line down the middle of the room.
- StaticWorx tiles have direction arrows printed on the back of the tiles. Install the tiles so that all arrows point in the same direction.
- Locate the center of this line and, using a carpenter's square or the 3, 4, 5 method, draw a perpendicular line. On this perpendicular line, snap a chalk line connecting the two sidewalls. The room will then be divided into quarters. Check for square by using the 3, 4, 5 method for small areas and 9, 12, 15 for larger areas.
- With the room properly squared, you can relocate your lines for a convenient starting place, or just start in the center of the room.
- Vacuum the pre-prepared area. Do not use wax or oil based sweeping compounds.
- It is recommended, in most situations, dry laying the installation completely, or the anticipated area to be installed that day. This allows the cutting-in of perimeter tiles to be a cleaner process with more working time, as the adhesive can set up quickly.
- Dry lay the first row of tiles, following chalk lines down the center of the area including end cuts. Lay seams together without stress (pressure fitting of tiles can cause peaking seams).
- Lay the second row at 90° to the first row following the chalk lines, at the center of the first row.
- Working from the center out, dry-lay the four sections including all perimeter cuts.
Adhesive Application
WARNING!
Be prepared to protect the flooring during and after the installation from sun, moisture, and other
construction trade (at least until adhesive has cured), if required, by covering 1-2 days with Masonite or plywood, insuring all joints are taped to prevent debris from becoming entrapped underneath and causing damage.
CAUTION: Overlapping the adhesive may telegraph through the flooring after the adhesive has cured.
Semi-Wet Method
- Uplift a workable area and vacuum the subfloor to remove any debris.
- Using the correct notch trowel, keep the adhesive in a straight line at the point it will be continued later. Apply the adhesive, allowing the appropriate open time (semi-wet). Open time will be a minimum of 10 minutes (V-notched). Open times will vary according to air temperature, subfloor temperature, concrete porosity, humidity and air circulation. The adhesive must be able to transfer to your fingertips with a light touch and just start to string (resulting in full adhesive transfer). If the adhesive is dry to the touch, do not install the floor covering - remove and replace the adhesive.

- Check that the back of the tile is clean then install the StaticWorx tiles into the semi-wet adhesive, exactly the same as they were dry laid.
TOP TIP: Using carpet off-cuts and double sided tape, cover the roller to help ensure you remove all air pockets from any dips in the substrate, and avoid a punch list.
- Roll slowly with a 150 lb. roller. Roll in both directions and avoid trapping air.
- If required, hand roll seam area gently with a hand roller to smooth seam. Do not press hard with hand roller.
- Remove any fresh adhesive from the surface of the flooring with water and a damp, clean cloth. Remove dried adhesive with rubbing alcohol and a clean cloth.
- After one hour, re-roll the entire area in both directions with a 100 lb. roller.
- Repeat steps until the installation is completed.


Application Follow Up
- Permit no foot traffic for 6-12 hours.
- Permit no heavy foot traffic for 24 hours.
- Allow no heavy rolling loads for 72 hours, i.e. hospital beds, operating room tables, and/or similar equipment.
- Maintain recommended temperature (68°F ± 5°F) during adhesive curing time (72 hours).
- Avoid initial maintenance of finished floor for 72 hours to allow adhesive to fully cure.
WARNING!
Be prepared to protect the flooring during and after the installation from sun, moisture, and other construction trade (at least until adhesive has cured), if required, by covering 1-2 days with Masonite or plywood, insuring all joints are taped to prevent debris from becoming entrapped underneath and causing damage.
CAUTION: When spreading the adhesive (after the seams have been cut), it is vitally important that the material not move. If necessary, place weights on the material so that no movement will occur as you spread adhesive. Overlapping the adhesive may telegraph through the flooring.
7. Additional Installation Info
In rooms up to 1000 sq. ft. in size, a copper strip must be applied to the subfloor and extended to a predetermined grounding point (can be connected by your flooring contractor or a qualified electrician). In rooms larger than 1,000 sq. ft. additional grounding points shall be defined and copper strips installed as mentioned above.
StaticWorx specified adhesive must be used for the installation of StaticWorx ESD protection flooring, using
recommended adhesive and trowel serration, refer to section 3, Adhesive Recommendations.
PLEASE NOTE: StaticWorx flooring products have been developed for indoor installation. StaticWorx floor coverings are not recommended for installation in outdoor applications or in particularly wet areas such as showers, swimming pools, etc.
Information and Downloads
Further Reading
ESD requirements for cleanrooms differ from other flooring applications. We offer tips and relevant technical details to help you choose the right ESD floor.
Standards for ESD floors in electronics manufacturing and handling services (EMS) are stringent. Learn how to choose the best ESD floor for your space.
In this hub, focused specifically on installation and maintenance, you’ll find accurate information on grounding, installing, and maintaining ESD flooring.
Get in Touch
The form below will help us better understand your needs and get you as quickly as possible to the right person. We look forward to helping you solve your static problem!
You can expect a response within 24 hours. For faster service, please give us a call: 617-923-2000
"*" indicates required fields
Visit our privacy policy to find out how we process data.

StaticWorx high-performance static-control floors protect electronic components, explosives, and high-speed computers from damage caused by static electricity. ESD flooring is part of a system. Choices should always be based on objective, researched evidence. When you partner with us, we look at all possible items that may need to integrate with the floor, and, focusing on your goals and objectives, help you find the right floor for your application.
Flooring Products

We accept these major credit cards.
Get in Touch
East Coast: 617-923-2000
Email: [email protected]
“I’m so glad we were able to find an attractive solution that didn’t leave us with some run-of-the-mill ugly disaster.”
Unless otherwise stated, standards referenced are the most up-to-date versions.
Share This
subscribe to newsletter
Sign up for our newsletter and occasional updates.
The FAA has updated its standard for facilities and electronic equipment. StaticWorx meets all requirements for ESD flooring.
Flooring Products

We accept these major credit cards.
“I’m so glad we were able to find an attractive solution that didn’t leave us with some run-of-the-mill ugly disaster.”
Share This
Get in Touch
East Coast: 617-923-2000
Email: [email protected]
subscribe to newsletter
Sign up for our newsletter and occasional updates.
The FAA has updated its standard for facilities and electronic equipment. StaticWorx meets all requirements for ESD flooring.
Unless otherwise stated, standards referenced are the most up-to-date versions.
Flooring Products

We accept these major credit cards.
Get in Touch
East Coast: 617-923-2000
Email: [email protected]
“I’m so glad we were able to find an attractive solution that didn’t leave us with some run-of-the-mill ugly disaster.”
Share This
subscribe to newsletter
Sign up for our newsletter and occasional updates.
The FAA has updated its standard for facilities and electronic equipment. StaticWorx meets all requirements for ESD flooring.
Unless otherwise stated, standards referenced are the most up-to-date versions.
All rights reserved. © 2008-2024, StaticWorx® GroundSafe™ ESD Flooring. Privacy Policy


