Against a dark blue background, the podcast title 'Static Bursts' appears in white at the top of the image, with an orange and white stopwatch icon between the two words. A lightning spark appears at the right hand side of the image with a cascade of sparks radiating out across the rest of the image. The podcast title Episode 14: How Adhesives Impact the Cost of ESD Flooring Installations are overlaid in white and a dark blue semi-opaque square covering the middle of the image. The company name and logo Staticworx appears in orange (first half) and white (second half) at the bottom.

Static Bursts (Ep #14): How Adhesives Impact the Cost of ESD Flooring Installations

In this episode of the Static Bursts podcast, Dave discusses the pros and cons of the three types of conductive adhesive typically used to install ESD floors, as well as a glue-free option. Each option has advantages and disadvantages. Find out which is the optimal choice for your space – and why.

The Gist: How Adhesives Impact the Cost of ESD Flooring Installation

Three types of conductive adhesives are typically used to install ESD floors: epoxy, acrylic, and pressure-sensitive. Each adhesive has advantages and disadvantages. Dave explains the differences, details pros and cons, and discusses why – and in what circumstances – one adhesive might be preferable over another. The fourth option is to choose a glue-free installation, such as interlocking ESD tiles. Interlocking tiles are chemical-free, have no fumes or mess, and can be installed in a functional workspace without disrupting operations.

  • When installing ESD tile, it’s important to factor in labor costs
    • some adhesives must dry before tile can be installed, adding time
    • mixing two-part epoxy adhesives takes time, also adding to labor costs
    • wet-set adhesives ooze and can be messy, so floor has to be cleaned
    • not all adhesives suit all applications
  • epoxy adhesive is hard to use and takes time to install, resulting in high labor costs
    • comes in 2 parts; parts must be mixed;
      • mixing takes time
    • tiles are wet set;
      • when rolled, adhesive may ooze over the seams, requiring cleaning
    • labor costs high
  • acrylic adhesive does not require mixing, so less expensive to use
    • must partially cure before laying tile, limiting window to get the job done
    • acrylic adhesive is a little bit easier to work with than epoxy adhesive
    • potential reduction in overall installation time, reducing labor costs
  • pressure-sensitive adhesive–quick and easy to install
    • should be allowed to dry before laying tile
      • dry adhesive helps with timing and seepage.
    • among adhesives, takes the least amount of time to install
      • potential for up to 3000 square feet per day for each installer
    • reduced labor cost – and less operational downtime during the installation.
    • pressure-sensitive adhesive does not prevent tile shrinkage
      • should only be used to install tiles that have a high degree of dimensional stability -and only with the tile manufacturer’s approval
  • glue-free interlocking tile–saves time; no chemicals, fumes or mess
    • may be used in spaces that would otherwise require a vapor barrier
    • glue-free tiles can be installed in operational rooms with no downtime
    • no chemicals, no noxious fumes, no mess
    • more expensive than laying regular ESD tile using a conductive adhesive

“If I could make one recommendation to a facility owner or even a general contractor, that would be to require someone from the tile manufacturer to show up on the job site – before the job starts or right at the point of a job start. If there’s one common denominator in all flooring failures, it’s that the job started out incorrectly [and continued that way].”

We’ve made it easy to subscribe on your favorite platform!  

Subscribe

Dave: Welcome to Static Talks. I’m your host, Dave Long, founder and president of StaticWorx. We make static control flooring. And our podcasts we’ll discuss the threat static electricity poses to your business and how to address these risks.

The reason I want to talk about adhesives today is so when you’re evaluating the cost of an ESD floor, one of the things you need to add into your evaluation is what will it actually cost for labor to install it. And one of the major factors with labor is the type of adhesive that will be used.

Reason that’s a big deal is different adhesives dry faster or more slowly. Some of them can be completely dry before you place a tile, some of them – because they’re often dark in color, almost black – if you put down too much adhesive, and it’s a wet set adhesive. When you roll the tiles on the floor, some of that adhesive is going ooze through the seams, which means you’re going to be cleaning adhesive at the same time as you’re installing your floor.

Let’s go through these adhesives – there’s four of them. And we’ll see how they impact the cost of a project. Let’s start with ESD epoxy adhesives. I’m not talking about an epoxy coating, that when it dries, you walk on it. I’m talking about an adhesive that has a Part A and Part B, that needs to be mixed. So right away, you’ve got an extra process, when you’re using ESP epoxy.

You’ve got to open up a can or a bucket or a pail. And you have to add a second ingredient to it that’s called the catalyst. And then using what looks almost like a like a large electric drill with a mixer on the end of it, you mix that adhesive, and typically most adhesive manufacturers will tell you to do that for two to three minutes.

So now you’ve taken two to three minutes to mix this adhesive. The next thing is because it’s an epoxy, and because of the catalyst, it has a certain amount of time before it’s going to harden. When I say harden, what I’m actually saying is if you left it in the bucket for an hour, it would be a solid, massive black carbon-loaded epoxy. So, this adhesive gets applied on the floor with a trowel. And immediately you place tiles into the adhesive, and you roll those tiles with a 100-pound roller. The reason you roll them is to make sure that the bottom of the tiles makes contact, full contact, with the adhesive. While the weight of the roller – if the floor has any kind of unevenness to it, the weight of the roller is going to basically push the adhesive in such a way that if there’s any break between two tiles – which there always is when you’re installing – some of that adhesive is going to come up through the seams. That means it’s going to get on the tiles, it’s going to get on the width of the tiles. If they’re not pushed together tightly, when it dries, you’ll see it; it’s going to get on the roller, which means that every time you push the roller further, as soon as that same contact point makes full circle and touches the floor you’re going to leave a deposit of epoxy. So, when you look at using an ESD epoxy, you need to think about am I going to be spending more money on labor, due to things I can’t control?

Rick: Okay, so a two-part epoxy adhesive requires some time to mix the two components. And then the clock starts ticking meaning if the mixture is not applied within a certain timeframe, it will become unusable. On top of that, this type of adhesive is subject to messy seepage issues, further complicating the installation by requiring cleanup. This sounds like a real challenge for the installers. What other options are there for adhesives?

Dave: Second type of adhesive is an acrylic conductive adhesive. These are one part so they don’t need to be mixed. However, unlike epoxy, you can’t necessarily place tile on them right away after you apply the adhesive, because they require a certain amount of exposure to air in order to dry. So the difficulty with acrylic adhesives is monitoring and understanding the window of opportunity when it’s time to put tile down and when it’s too late to put tile down.

So far, we’ve talked about epoxy and acrylic. I just want to go back to epoxy for a second. A good efficient installer can probably install about 600, maybe 800 square, feet of flooring per day with an epoxy. That number will bump up to about 800 to 1000 with acrylic adhesive, because obviously they’re not mixing it, it’s a little bit easier to work with.

Rick: All right, so acrylic adhesive does not require mixing, but it does have to partially cure before laying tile down on it. So again, there’s a limited window of opportunity to get the job done properly. But on the upside acrylic adhesive is a little bit easier to work with than epoxy adhesive, which can potentially reduce the overall installation time and therefore reduce the cost of labor by up to 33%. What is the next type of adhesive?

Dave: Next type of adhesive is a conductive pressure-sensitive adhesive. This is an adhesive that you allow to dry completely, so you can put your fingers on it, press down on it. And if you don’t get any transfer from the adhesive you’ve applied to the substrate onto your fingers, it’s time to lay tile.

You can see what the advantages to that adhesive will be. If it’s dry, that means you can put the tile down, roll it and you won’t get any seepage. To give you an example how that kind of adhesive can enhance the ability to get a job done: We worked a job in Wisconsin a few years ago; it was a 250,000 square-foot job. And the union contractor doing that job with four men was able to install 12,000 square feet of tile perfectly per day.

Think about that. That’s 3000 square feet per man – versus 1000 versus 800. So right away, when you’re looking at a project, one of the things you want to think about is – what’s the labor cost? What’s the cleanup cost, because with the pressure sensitive adhesive, it’s just soap and water to clean up when you’re done. If you do happen to get a little bit of seepage because some of the adhesive hadn’t dried, you can wash it off with a sponge.

So, you got three adhesives. Why wouldn’t you just use pressure-sensitive every time? Well, here’s the kicker, most ESD tile can’t be installed with pressure-sensitive adhesive, because most ESD tile will shrink if it’s not held down with either an acrylic or an epoxy adhesive. The last thing you want to do is go out and buy someone else’s adhesive and use it with a tile that it hasn’t been approved for. Any manufacturer of tile that you’re working with should be able to coach you on these adhesives. And they should also be willing to send someone out to the job site to make sure you’re using them right when you first start.

Rick: So conductive pressure-sensitive adhesive should be allowed to dry before laying tile, which helps a lot with some of the challenges associated with epoxy and acrylic adhesives, such as timing and seepage. As a result, pressure-sensitive requires the least amount of time to install with the potential for up to 3000 square feet per day for each installer. That reduces both the labor cost and the associated cost of operational downtime during the installation. However, pressure sensitive adhesive doesn’t prevent tile shrinkage the way that epoxy and acrylic adhesives do. So, it should only be used to install tiles that have a high degree of dimensional stability and only with the tile manufacturer’s approval.

We have discussed three different types of ESD adhesive, epoxy acrylic and pressure sensitive. Is there another installation method to consider?

Dave: In our industry right now all the rage is flooring that doesn’t require adhesive. People call these floors interlocking floors; they call them floating floors. There’s any number of names. The beauty of these floors is that you don’t have to deal with a variable like dry time. What trowel to use? Is the humidity different today? Why isn’t the adhesive curing the way it did yesterday? So interlocking floors are a great solution for any number of situations where adhesive either can’t be used or if an adhesive won’t work.

A good application for interlocking flooring is any place where there’s a need for a vapor barrier. However, you want to evaluate – what does the interlocking floor cost me versus dealing with the vapor problem by applying a vapor barrier? The downside of the interlocking flooring is it costs more than traditional flooring. The upside, you can install it in an environment where you can continue to work. Because you don’t have to worry about chemicals or a lot of floor prep, dry times, you can immediately walk on it as soon as a tile is put in place.

Rick: So interlocking or floating floor installations do not require any adhesive and thus avoid the costly time and mess associated with adhesives. This method also means that vapor emissions from the concrete sub floor, which can break down adhesives over time, are not a problem for interlocking floors. On the other hand, the tiles themselves cost more per square foot than other types of ESD flooring. So clearly there are several factors including cost, time and environmental variables that will influence the decision of how to install an ESD floor. Is there one method that stands out as being the most cost-efficient, overall?

Dave: They all have their place. One isn’t necessarily better than others. However, given the four options, if there’s a way to make a pressure-sensitive adhesive work, that’s going to be your most effective option. And it’s also going to be your least costly option due to the advantages that it presents.

Rick: Dave, what advice do you have for someone who has to determine the best method of installation for their ESD floor?

Dave: Rick, if I could make one recommendation to a facility owner or even a general contractor, that would be that they should require someone from the tile manufacturer to show up on the job site before the job starts or right at the point of a job start. If there’s one common denominator in all flooring failures, it’s that the job started out incorrectly. And because no one was there to stop the job, it just continued that way and you just end up with a total failure.

We hope you learned something today. If you have questions about the podcast, give us a call at 617-923-2000. Even though we specialize in solving problems with flooring, if you have a question about static discharge, how to install a floor, or how to test the floor, we’ll be glad to help you. Thanks for listening.

Get in Touch

The form below will help us better understand your needs and get you as quickly as possible to the right person. We look forward to helping you solve your static problem! 

You can expect a response within 24 hours. For faster service, please give us a call: 617-923-2000

Visit our privacy policy to find out how we process data.

Twitter
LinkedIn
Facebook
Reddit
Pinterest
Email

Other Podcast Episodes

Against a dark blue background, the podcast title 'Static Bursts' appears in white at the top of the image, with an orange and white stopwatch icon between the two words. A lightning spark appears at the right hand side of the image with a cascade of sparks radiating out across the rest of the image. The podcast title Episode 1: Avoid Flooring Failure: What to Know Before Installing Static-Control Flooring Over Concrete is overlaid in white and a dark blue semi-opaque square covering the middle of the image. The company name and logo Staticworx appears in orange (first half) and white (second half) at the bottom.

Static Bursts (Ep #1): Avoid Failures

Moisture problems are the #1 cause of failed flooring installations. Often the result of aquifers or other environmental conditions, moisture may be invisible. So how do you know if you have a moisture problem? How do you fix the problem? What happens if you choose to ignore moisture readings? If you’re in a 24/7 operational facility, such as a call or data center, a police station, a flight tower or other critical space, how do you solve a moisture problem – adhesive breakdown, for example – without shutting down or compromising your core mission? Dave Long, president of Staticworx, Inc., discusses these and other issues related to mitigating moisture in new construction, renovations, and occupied workspaces.

Read More
Against a dark blue background, the podcast title 'Static Bursts' appears in white at the top of the image, with an orange and white stopwatch icon between the two words. A lightning spark appears at the right hand side of the image with a cascade of sparks radiating out across the rest of the image. The podcast title Episode 2: Why Do You Recommend Static-Dissipative For Some Applications and Conductive For Others? is overlaid in white and a dark blue semi-opaque square covering the middle of the image. The company name and logo Staticworx appears in orange (first half) and white (second half) at the bottom.

Static Bursts (Ep #2): Static-Dissipative versus Conductive Flooring

Have you ever wondered why we recommend static-dissipative flooring for some applications and conductive for others? Shouldn't both types of flooring work for any application? No, because electrical standards vary by industry.In episode 2 of Static Bursts, Dave and Rick discuss the technical difference between static-dissipative and conductive floors. Standards for flight towers, communications facilities and other end-user applications require flooring with electrical resistance measuring between 1.0 x 10E6 and 1.0 x 10E9. Standards for electronics manufacturing, however, allow for any floor measuring below 1.0 x 10E9. Dave explains why it's important to know and follow industry standards for the specific application where the ESD floor will be installed.

Read More
Against a dark blue background, the podcast title 'Static Bursts' appears in white at the top of the image, with an orange and white stopwatch icon between the two words. A lightning spark appears at the right hand side of the image with a cascade of sparks radiating out across the rest of the image. The podcast title Episode 3: Why Resistance Tests Alone Are Not Enough to Properly Qualify an ESD Floor is overlaid in white and a dark blue semi-opaque square covering the middle of the image. The company name and logo Staticworx appears in orange (first half) and white (second half) at the bottom.

Static Bursts (Ep #3): Why Resistance Tests Alone Are Not Enough to Properly Qualify An ESD Floor

How can you predict whether an ESD flooring material will perform in your workspace? What tests should you do to qualify the floor & why does it matter how the tests are performed? In 2014, ESD standard S20.20 changed to include point-to-point and system resistance tests as well as walking body voltage tests. Learn why these tests matter, what they entail, how to perform the tests properly, and why it’s crucial to evaluate the flooring-footwear combination. Dave Long, president of Staticworx, discusses a process called the Qualification Phase – i.e., the tests that should be performed on flooring materials under consideration, before you select an ESD floor.

Read More
Against a dark blue background, the podcast title 'Static Bursts' appears in white at the top of the image, with an orange and white stopwatch icon between the two words. A lightning spark appears at the right hand side of the image with a cascade of sparks radiating out across the rest of the image. The podcast title Episode 4: How to Avoid Problems When Installing ESD Flooring Over Existing Surfaces is overlaid in white and a dark blue semi-opaque square covering the middle of the image. The company name and logo Staticworx appears in orange (first half) and white (second half) at the bottom.

Static Bursts (Ep #4): Avoiding Problems When Installing ESD flooring Over Existing Surfaces

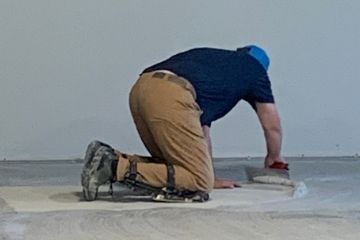
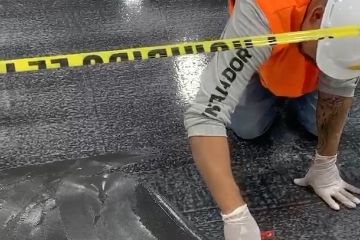
New floors are typically installed over the following pre-existing surfaces: VCT (vinyl composition tile), VAT (vinyl asbestos tile), or coatings over concrete. While it is possible and sometimes preferable to install a new floor directly over an old surface, a number of steps should be taken to ensure that the new floor does not fail. The steps including destructive testing to determine whether the bond between the existing surface and subfloor (or existing surfaces) is intact and exactly what lies below the current surface - subfloor? Old tile or coating? Layers of tiles? – as well as testing for asbestos and other regulated chemicals. Dave Long and Rick Frauton discuss situations in which companies have run into trouble, installing new flooring over old, and explain the steps necessary to avoid similar problems.

Read More
Against a dark blue background, the podcast title 'Static Bursts' appears in white at the top of the image, with an orange and white stopwatch icon between the two words. A lightning spark appears at the right hand side of the image with a cascade of sparks radiating out across the rest of the image. The podcast title Episode 5: Hidden Costs of Flooring Installations Part I - Vapor in the Concrete is overlaid in white and a dark blue semi-opaque square covering the middle of the image. The company name and logo Staticworx appears in orange (first half) and white (second half) at the bottom.

Static Bursts (Ep #5): Hidden Costs of Flooring Installations (Part I) – Vapor in the Concrete

Moisture or vapor in the concrete subfloor can cause your floor to fail, resulting in serious costs down the line – in some cases, vacating the premises and installing a new floor. People often assume, falsely, that in arid climates, moisture is non-existent. In this episode, Dave and Rick discuss what happens when people fail to do their due diligence (perform moisture tests or ignore readings), and offers advice on how to avoid costly problems.

Read More
Against a dark blue background, the podcast title 'Static Bursts' appears in white at the top of the image, with an orange and white stopwatch icon between the two words. A lightning spark appears at the right hand side of the image with a cascade of sparks radiating out across the rest of the image. The podcast title Episode 6: Hidden Costs of ESD Flooring (Part II): Maintenance and Repair is overlaid in white and a dark blue semi-opaque square covering the middle of the image. The company name and logo Staticworx appears in orange (first half) and white (second half) at the bottom.

Static Bursts (Ep #6): Hidden Costs of ESD Flooring (Part II) – Maintenance and Repair

How do you calculate the actual (full) cost of an ESD floor? Upfront costs for material and installation are only part of the total expenditure. To evaluate the actual, long-term cost of an ESD floor, it’s important to consider the costs of maintenance and repair. In this episode of Static Bursts, Dave and Rick discuss maintenance and repair of ESD epoxy, vinyl, carpet and rubber flooring and what you can expect from each flooring material.

Read More
Against a dark blue background, the podcast title 'Static Bursts' appears in white at the top of the image, with an orange and white stopwatch icon between the two words. A lightning spark appears at the right hand side of the image with a cascade of sparks radiating out across the rest of the image. The podcast title Episode 7: Installing ESD Flooring in a 24/7 Facility Without Distrupting Operations are overlaid in white and a dark blue semi-opaque square covering the middle of the image. The company name and logo Staticworx appears in orange (first half) and white (second half) at the bottom.

Static Bursts (Ep #7): Installing ESD Flooring in a 24/7 Facility Without Disrupting Operations

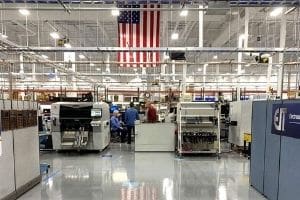
Installing a floor in a 24/7 operational facility comes with its own set of challenges. As with any flooring installation, it’s important to consider logistics: Will chemicals be used? Adhesives? Coatings? Are there toxins or odors to deal with? What is the condition of the current floor or subfloor? Will the old floor require removal? Dave and Rick discuss the optimal way to install an ESD floor in 24/7 operational spaces – without adhesive or chemicals and with neither downtime nor disruption.

Read More
Against a dark blue background, the podcast title 'Static Bursts' appears in white at the top of the image, with an orange and white stopwatch icon between the two words. A lightning spark appears at the right hand side of the image with a cascade of sparks radiating out across the rest of the image. The podcast title Static Bursts Episode 8 - The Evolution of ESD Epoxy - From Cheap Black Paint to High-Performance Easy-to-Clean Generation 3 Coatings are overlaid in white and a dark blue semi-opaque square covering the middle of the image. The company name and logo Staticworx appears in orange (first half) and white (second half) at the bottom.

Static Burst (Ep #8): The Evolution of ESD Epoxy – From Cheap Black Paint to High-performance, Easy-to-Clean Generation Three Coatings

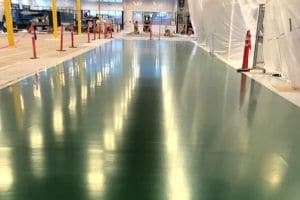
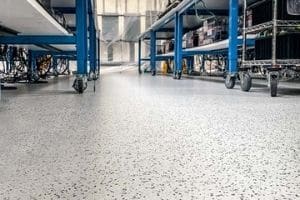
ESD Epoxy coatings have evolved over the years to meet the needs of different industries. Generation 1 coatings, consisting of a single layer of black paint, were cheap, easy to repair and ugly. Today’s Generation 3 epoxy coatings are attractive, easy to install and repair, and offer significant improvements in ESD performance. In this podcast, Dave and Rick discuss the history and evolution of ESD epoxy coatings – from their introduction in the 1950s, through improvements in Gen 2 coatings, to the high-performance Gen 3 coatings available today.

Read More
Against a dark blue background, the podcast title 'Static Bursts' appears in white at the top of the image, with an orange and white stopwatch icon between the two words. A lightning spark appears at the right hand side of the image with a cascade of sparks radiating out across the rest of the image. The podcast title Episode 10: ESD Flooring and Electrical Safety are overlaid in white and a dark blue semi-opaque square covering the middle of the image. The company name and logo Staticworx appears in orange (first half) and white (second half) at the bottom.

Static Bursts (Ep #10): ESD Floors and Electrical Safety

In this episode, Dave and Rick discuss ESD floors and electrical safety. At some point when discussing grounded conductive floors, the question of safety always arises, along with whether or not grounding a conductive floor puts people in harm’s way. Referring to an actual case study, Dave talks about a situation in which a floor installed for the FAA was too conductive to meet the FAA safety standards. The client had been told that drying the pressure-sensitive adhesive would solve the problem, making the entire floor less conductive. Dave talks about why this is not true, and why it’s extremely important to adhere to electrical standards as they are written.

Read More
Against a dark blue background, the podcast title 'Static Bursts' appears in white at the top of the image, with an orange and white stopwatch icon between the two words. A lightning spark appears at the right hand side of the image with a cascade of sparks radiating out across the rest of the image. The podcast title Episode 11: What is ESD Flooring and How Does It Work? are overlaid in white and a dark blue semi-opaque square covering the middle of the image. The company name and logo Staticworx appears in orange (first half) and white (second half) at the bottom.

Static Bursts (#Ep 11): What is ESD Flooring and How Does It Work?

ESD flooring is a generic term. In this episode, Dave and Rick discuss what people mean by ESD flooring. Dave provides a basic tutorial on how ESD floors work, and why – rather than relying on a manufacturer’s spec sheet - it’s crucial to test the electrical properties of any ESD floor under consideration.

Read More
Against a dark blue background, the podcast title 'Static Bursts' appears in white at the top of the image, with an orange and white stopwatch icon between the two words. A lightning spark appears at the right hand side of the image with a cascade of sparks radiating out across the rest of the image. The podcast title Episode 12: Hidden Costs of Flooring Installations (Part III): ESD Carpet Durability are overlaid in white and a dark blue semi-opaque square covering the middle of the image. The company name and logo Staticworx appears in orange (first half) and white (second half) at the bottom.

Static Bursts (Ep #12): Hidden Costs of Flooring Installations (Part III): ESD Carpet Durability

ESD carpet can be an ideal floor for many different spaces, particularly for critical 24/7 operations where a soft walking surface and/or sound attenuation is necessary or desired. Carpet is also attractive and, compared to certain higher-cost materials, reasonably priced. There are, however, hidden costs buyers should be aware of before selecting ESD carpeting. In this podcast, Dave and Rick discuss the reasons carpet construction, fiber geometry, modification ratio and carpet design are crucial for understanding the real cost of ESD carpet.

Read More
Against a dark blue background, the podcast title 'Static Bursts' appears in white at the top of the image, with an orange and white stopwatch icon between the two words. A lightning spark appears at the right hand side of the image with a cascade of sparks radiating out across the rest of the image. The podcast title Episode 13: Why One Type of ESD Flooring Doesn't Fit All Applications are overlaid in white and a dark blue semi-opaque square covering the middle of the image. The company name and logo Staticworx appears in orange (first half) and white (second half) at the bottom.

Static Bursts (#Ep 13): Why One Type of ESD Flooring Doesn’t Fit All Applications

In this short 3-minute podcast episode, Dave and Rick talk about why no single type of ESD flooring material is suitable for every application. Flooring materials like ESD vinyl must be used in conjunction with special ESD footwear. Those materials are unsuitable for facilities in which personnel wear regular street shoes. In spaces where street shoes are allowed – data centers, 9-1-1 call centers and government offices, for instance – the ESD floor must dissipate static to ground and also inhibit static generation in the first place.

Read More
Against a dark blue background, the podcast title 'Static Bursts' appears in white at the top of the image, with an orange and white stopwatch icon between the two words. A lightning spark appears at the right hand side of the image with a cascade of sparks radiating out across the rest of the image. The podcast title Episode 15: The Importance of Qualifying ESD Flooring are overlaid in white and a dark blue semi-opaque square covering the middle of the image. The company name and logo Staticworx appears in orange (first half) and white (second half) at the bottom.

Static Bursts (Ep. #15): The Importance of Qualifying ESD Flooring

Properly qualifying an ESD floor requires more than testing for electrical resistance. We used to believe that the conductivity of a floor predicted its potential for static charge generation. We now know that resistance and charge generation are independent qualities: one does not relate to the other. A floor can be conductive and still generate static electricity. We also know that flooring materials perform differently with different types of footwear. In this episode, Dave and Rick discuss why it’s important to test the floor as part of an integrated ESD flooring/footwear system – and to test for both conductivity and charge generation.

Read More
Against a dark blue background, the podcast title 'Static Bursts' appears in white at the top of the image, with an orange and white stopwatch icon between the two words. A lightning spark appears at the right hand side of the image with a cascade of sparks radiating out across the rest of the image. The podcast title Episode 16: ESD Chairs: A Bridge Between Two Perfect Methods of Grounding are overlaid in white and a dark blue semi-opaque square covering the middle of the image. The company name and logo Staticworx appears in orange (first half) and white (second half) at the bottom.

Static Bursts (Ep #16): ESD Chairs: A Bridge Between Two Perfect Methods of Grounding

In this episode, Dave and Rick explain how ESD chairs work and why they act as a bridge between two perfect methods of grounding (an ESD floor and wrist strap). The ESD floor grounds and prevents charge generation while people walk. Once the person sits and lifts his or her feet, they are no longer grounded. There may be a wrist strap at the work station, but until the person puts it on they’re a live wire. If they touch a component – or expensive prototype, for example – before putting on the wrist strap, any charge on their body will transfer to the component. ESD chairs ground the person in the chair, prevent charge generation and protecting against random ESD events.

Read More
Against a dark blue background, the podcast title 'Static Bursts' appears in white at the top of the image, with an orange and white stopwatch icon between the two words. A lightning spark appears at the right hand side of the image with a cascade of sparks radiating out across the rest of the image. The podcast title Episode 17: Replacing a Failing Floor Without Losing Production Time is overlaid in white and a dark blue semi-opaque square covering the middle of the image. The company name and logo Staticworx appears in orange (first half) and white (second half) at the bottom.

Static Bursts (Ep #17): Case Study – Replacing a Failing Floor Without Losing Production Time

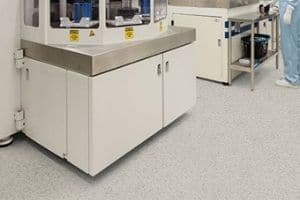
StaticWorx was asked to evaluate a failing floor in an electronics manufacturing facility. After a fire the client had purchased a new ESD vinyl tile floor. Three months into the installation the floor was already lifting. In addition to unmitigated vapor, the building had been built using tilt-up construction. Silicone bond-breakers - sprayed on the concrete to keep the wall slabs from adhering to the subfloor - contaminated the concrete, preventing the tile from adhering properly. As the building was operational and the client wanted to avoid shutdown, Dave recommended interlocking ESD vinyl tile. StaticWorx installed a 10’ x 10’ test patch. Two months later, the interlocking floor was intact. StaticWorx covered the entire floor in the operational facility with interlocking vinyl tile - without the client’s losing a day of production.

Read More
Against a dark blue background, the podcast title 'Static Bursts' appears in white at the top of the image, with an orange and white stopwatch icon between the two words. A lightning spark appears at the right hand side of the image with a cascade of sparks radiating out across the rest of the image. The podcast title Episode 18: ESD Flooring Selection (Part 1) is overlaid in white and a dark blue semi-opaque square covering the middle of the image. The company name and logo Staticworx appears in orange (first half) and white (second half) at the bottom.

Static Bursts #18: ESD Flooring Selection (Part 1)

Most people looking to purchase an ESD floor are starting at ground zero, with little knowledge about the product. In this two part series, Dave and Rick discuss the key criteria for selecting an ESD floor. Part one covers the application (environment and work performed in the space); aesthetics; installation methods; and maintenance requirements.

Read More
Against a dark blue background, the podcast title 'Static Bursts' appears in white at the top of the image, with an orange and white stopwatch icon between the two words. A lightning spark appears at the right hand side of the image with a cascade of sparks radiating out across the rest of the image. The podcast title Episode 19: ESD Flooring Selection (Part 2) is overlaid in white and a dark blue semi-opaque square covering the middle of the image. The company name and logo Staticworx appears in orange (first half) and white (second half) at the bottom.

Static Bursts #19: ESD Flooring Selection (Part 2)

When choosing an ESD floor, it’s important to consider all the variables related to your specific application. Will you roll heavy loads on the floor? Do you need noise attenuation, anti-fatigue characteristics, or reflectivity? How long do you plan to stay in the building? When evaluating options, remember that the cost per square foot is only one part of the total cost of owning the floor. Installation, labor, maintenance, operational downtime add up – in the short term as well as over time.

Read More
Against a dark blue background, the podcast title 'Static Bursts' appears in white at the top of the image, with an orange and white stopwatch icon between the two words. A lightning spark appears at the right hand side of the image with a cascade of sparks radiating out across the rest of the image. The podcast title Episode 20: The Pitfalls of ESD Flooring Selection: How to Avoid Flooring Failure (Part 1) is overlaid in white and a dark blue semi-opaque square covering the middle of the image. The company name and logo Staticworx appears in orange (first half) and white (second half) at the bottom.

Static Bursts #20: The Pitfalls of ESD Flooring Selection: How to Avoid Flooring Failure (Part 1)

Three fundamental mistakes account for a majority of ESD flooring failures: selecting the wrong floor for the application: failure to consider total cost of ownership; failing to test the floor after it’s been installed. Avoiding these mistakes helps ensure success. This first of a two-part series on avoiding ESD flooring failures explains why it’s important to select a floor based on the specific application and details the primary considerations that should be taken into account: assessing the type of footwear people will wear in the space and considering goals and objectives, including how the space will be used.

Read More
Against a dark blue background, the podcast title 'Static Bursts' appears in white at the top of the image, with an orange and white stopwatch icon between the two words. A lightning spark appears at the right hand side of the image with a cascade of sparks radiating out across the rest of the image. The podcast title Episode 21: Installing ESD Flooring: Avoiding Pitfalls (Part 2) is overlaid in white and a dark blue semi-opaque square covering the middle of the image. The company name and logo Staticworx appears in orange (first half) and white (second half) at the bottom.

Static Bursts #21: Installing ESD Flooring: Avoiding Pitfalls (Part 2)

The cost of flooring materials is only part of the total cost of ownership. To calculate the long-term cost of owning a floor, consider installation, maintenance, repairs, and downtime required for maintenance and repair. Aesthetics are another consideration. this podcast, Dave and Rick describe scenarios that occur when people base flooring decisions solely on the cost of the material. Dave also explains why it’s crucial to test an ESD floor immediately after it’s been installed.

Read More
Background graphic is a still from the StaticWorx GroundSafe ESD Flooring – Your Trusted Partner explainer animation. In the foreground at the bottom are two boxes. The top is a bright blue with the StaticWorx logo and "GroundSafe ESD Flooring" underneath in white. The second is a dark blue-gray and includes the text in white: “GroundWorx ESD Flooring – Your Trusted Partner”
Play Video

StaticWorx high-performance static-control floors protect electronic components, explosives, and high-speed computers from damage caused by static electricity. ESD flooring is part of a system. Choices should always be based on objective, researched evidence. When you partner with us, we look at all possible items that may need to integrate with the floor, and, focusing on your goals and objectives, help you find the right floor for your application.