Learn the differences between ESD solid vinyl tile and interlocking ESD tile. The post compares specs, installation, maintenance and intangibles.
ESD Flooring Installation: Bond Test and Manufacturer Oversight Are Critical to ESD Flooring Success
4 min read, 2 min videos
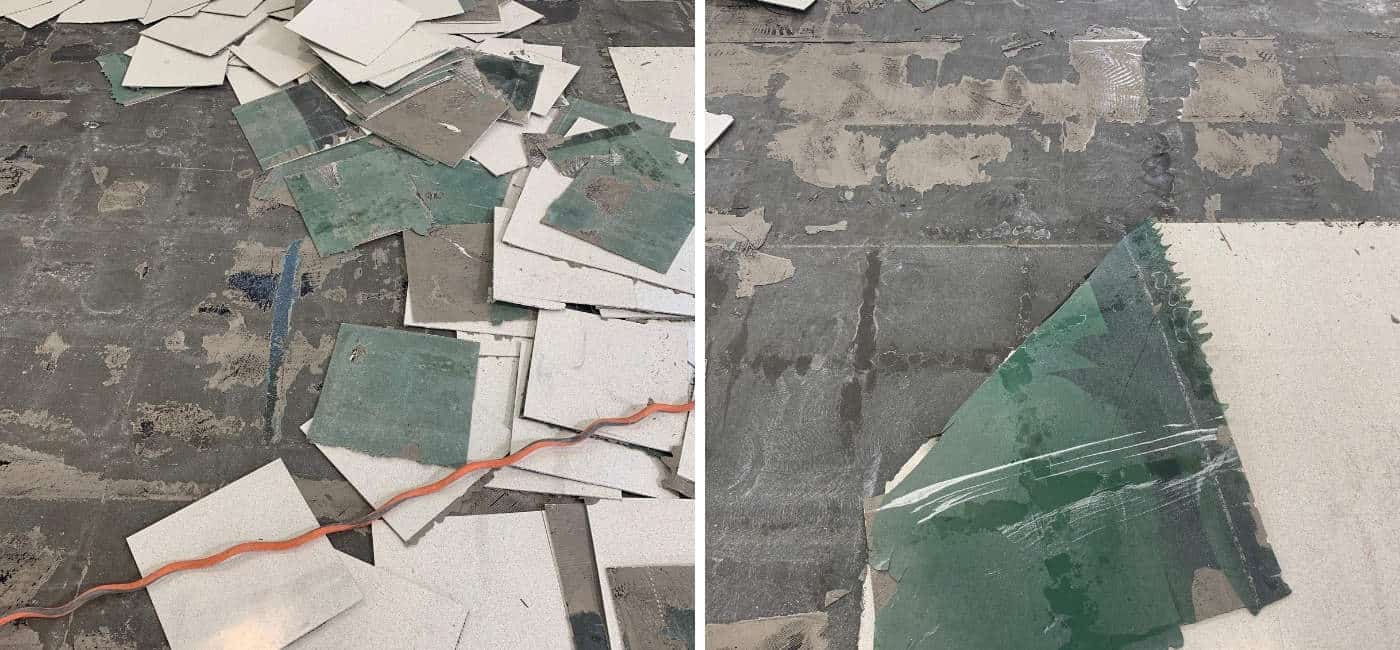
Concrete contamination and inadequate floor prep prior to installing the epoxy vapor barrier resulted in an improper bond. ESD vinyl tiles peeled easily from the floor, with the vapor barrier attached to the tile backing.
Before installing an ESD floor, it’s crucial to be sure the subfloor has been properly prepped.
THE GIST: Ensuring a Successful ESD Flooring Installation
- An improperly installed vapor barrier will not adhere to the subfloor.
- When the bond between vapor barrier and subfloor fails, the tiles will lift.
- Ensuring a strong bond requires due diligence:
- Take a core sample
- Perform a bond test
- Investigate type of building construction
- With a good bond, the tiles will not lift – even with a chisel.
- Get the tile manufacturer involved.
Key point: The flooring supplier should be consulted prior to the start of installations to advise on due diligence – including site analysis, possible core sampling and bond testing – and to be sure the tiles are installed properly.
Case Study: Part One - Improperly Prepped Floor
StaticWorx was called to investigate failing ESD vinyl tiles in an electronics manufacturing facility in Southern California. The installer had neglected to perform adequate floor prep before installing an epoxy vapor barrier. As a result, the vapor barrier did not adhere to the concrete subfloor and the tiles lifted.
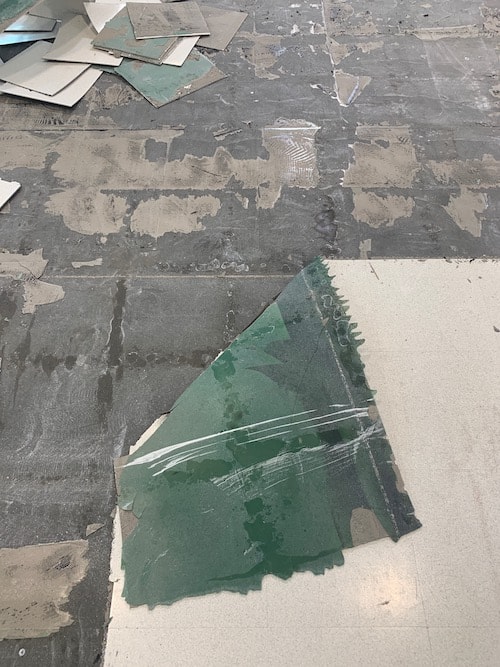
Improper floor prep resulted in a vapor barrier that did not adhere to the concrete subfloor.

Note: the green material is the vapor barrier.
Test the concrete before installing a vapor barrier.
The facility in question had been built using tilt-up construction. The chemical bond used in this type of construction can contaminate the concrete subfloor. Without core samples, there was no way to know how deeply the chemical had penetrated the concrete or how to properly profile (etch or score) the concrete subfloor before installing the vapor barrier.
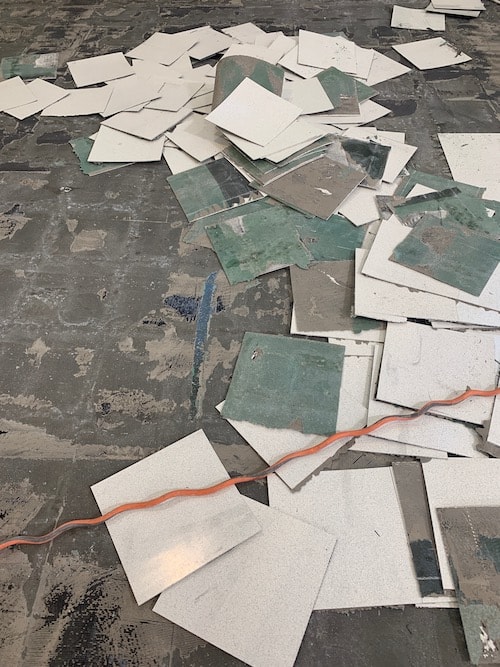
Result of improperly prepped subfloor.
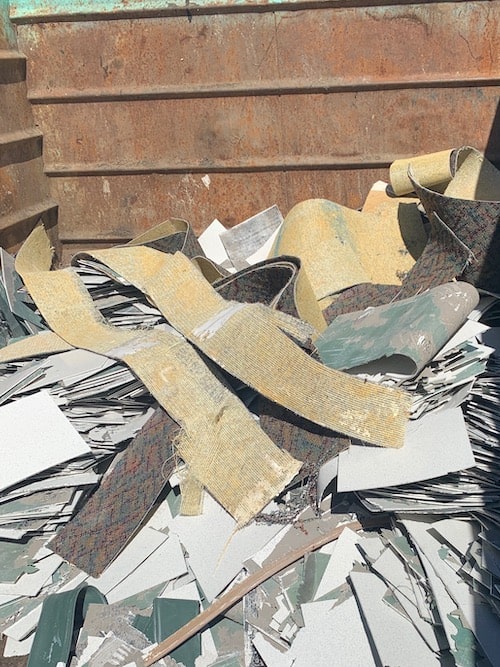
Tiles awaiting disposal.
Part Two - A Properly Prepped Floor

Why a Chisel?
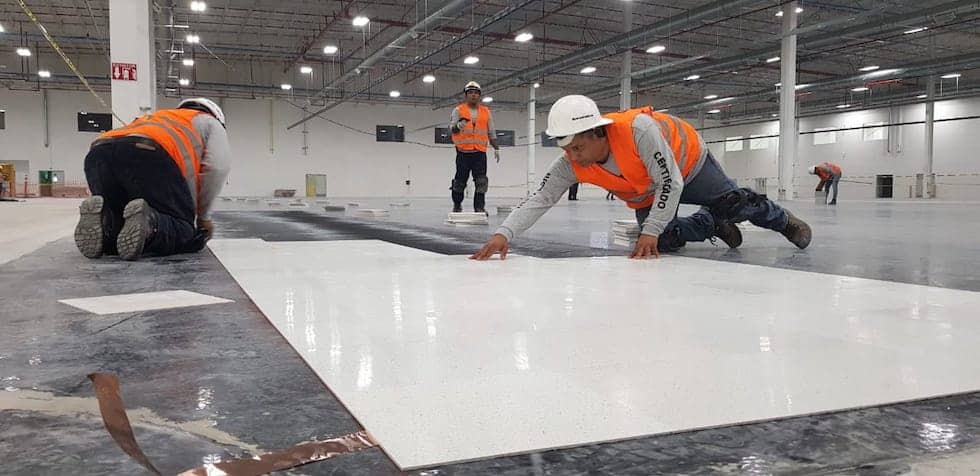
In the first video, a machine lifts the tile. Could a machine have removed the tiles in the second video just as easily? The answer is no. Why? Because the tile is so well adhered that the machine would have rolled right across it. A chisel – and a lot of brute force – was the only way to remove the ESD tile.
Removing an inadequately prepped floor can add significantly to the cost of an ESD flooring installation.

Due Diligence Helps to Ensure a Successful ESD Flooring Installation
Before installing an ESD floor it’s crucial to be sure the subfloor has been properly prepped. These steps will help to ensure your installation is a success:
- investigate the type of construction
- chemicals used in construction can contaminate the concrete
- take a core sample to determine the depth of contamination
- bond test to gauge proper surface profile.
Further Resources


About StaticWorx, Inc
All StaticWorx posts are written by our technical team and based on industry standards and specifications, test data, independent lab reports and other verifiable data. We provide ESD training and offer CEU credits to architects. If you’re interested in an ESD training session or our architects’ ESD workshop, give us a call: 617-923-2000.
Get in Touch
The form below will help us better understand your needs and get you as quickly as possible to the right person. We look forward to helping you solve your static problem!
You can expect a response within 24 hours. For faster service, please give us a call: 617-923-2000
"*" indicates required fields
Visit our privacy policy to find out how we process data.
More Blog Posts
To maintain performance, ESD floors require specially formulated products. We offer tips on what to consider when choosing cleaning supplies.
Static-dissipative floors transport harmful static charges to ground. Dissipative is also a term for flooring with a specific, measurable electrical resistance.
StaticWorx recognized as one of the fastest growing private companies in the U.S. 2023 marks StaticWorx fourth appearance on Inc. 5000 list.
Conductive and dissipative flooring protect electronics by transporting charges to ground, conductive at a quicker rate, dissipative slower & more controlled.
We explain the 3 main ways to test an ESD floor: Electrical resistance; body voltage & ESD audits, with advantages and reasons for each.
Three critical factors—application, industry standards & footwear—help you choose the best ESD floor, while ensuring the safety & efficiency of your operations.
StaticWorx Founder and President Dave Long shares three of his recommended reads: Quit, How to Change, and The Goal.
There are leadership qualities StaticWorx strives to embody every day, with every product, throughout each project.
No matter how you slice and dice a project, an ESD floor is a major investment. This blog post examines five ways to keep undue costs down.
What’s the difference between static control and static resistant? Or anti-static flooring? Find out more in our blog post.
A major part of any ESD control program is getting proper flooring in place. How can one replace a floor without generating any debris? Learn more.
A well-designed, comprehensive, fully realized program is a must for manufacturers serious about ESD control. Learn why ESD programs fail.
ESD Floors should never be specified based on the descriptive terms conductive or static dissipative. Always base ESD specs on verifiable metrics. Find out why.
<a class="eael-grid-post-link" href="https://staticworx.com/case-studies/esd-flooring-failure-incorrect-testing/" title="Blog Post: Case Study: ESD Flooring Failure, Incorrect Testing: Always Qualify Your Floor Using ANSI/ESD Test Methods">Blog Post: Case Study: ESD Flooring Failure, Incorrect Testing: Always Qualify Your Floor Using ANSI/ESD Test Methods
To comply with relevant ESD standards, test electrical properties using methods outlined in ESD S20.20. For best results require testing by an independent lab.
<a class="eael-grid-post-link" href="https://staticworx.com/technical-info/conductive-static-dissipative-flooring-difference/" title="Blog Post: Conductive and Static-Dissipative Flooring: What’s the Difference?
The Layperson’s Answer">Blog Post: Conductive and Static-Dissipative Flooring: What’s the Difference?
The Layperson’s Answer
What’s the difference between conductive and static-dissipative flooring? Facts, analogies and images illustrate the difference in easily understood terms.
Qualifying an ESD floor helps ensure you get the floor you paid for. Find out why you should always qualify according to ESD S20.20
Qualification is the first step in selecting an ESD floor. Learn how to perform resistance tests to be sure the floor meets electrical & safety standards.
Will bare concrete control static? Learn why concrete floors are unreliable & what precautions to take if you must work on a bare concrete floor.
A look at how the StaticWorx cartoon, 'Conductive Flooring Does Not Mean Antistatic Flooring,' was conceived and created.
Learning Center Articles
- ESD Basics
- Installation & Maintenance
- Selecting & Specifying an ESD Floor
- Technical Information
- 7 Common Mistakes Selecting an ESD floor
- A Guide to ESD Flooring Selection
- Avoid Costly Failures: What You Need to Know When Specifying ESD Flooring
- Choosing ESD Flooring for:
- ESD Footwear: What Is It and When Is It Necessary?
- ESD Footwear for Electronics Manufacturing and Handling Applications
- Facility Managers’ Guide to Selecting ESD Flooring
- The Need for Due Diligence in Specifying Static-Free Flooring
- Standard of Care for Specifying Floors in Mission-Critical Spaces
- Understanding the Hidden Costs of ESD Flooring
StaticWorx high-performance static-control floors protect electronic components, explosives, and high-speed computers from damage caused by static electricity. ESD flooring is part of a system. Choices should always be based on objective, researched evidence. When you partner with us, we look at all possible items that may need to integrate with the floor, and, focusing on your goals and objectives, help you find the right floor for your application.


