Grounding an ESD floor is straightforward and easy. Conductive adhesive eliminates the need for expensive copper equipotential grounding grids of the past. Watch our ‘How to…’ video to find out more.
Transcript How to Ground an ESD Floor

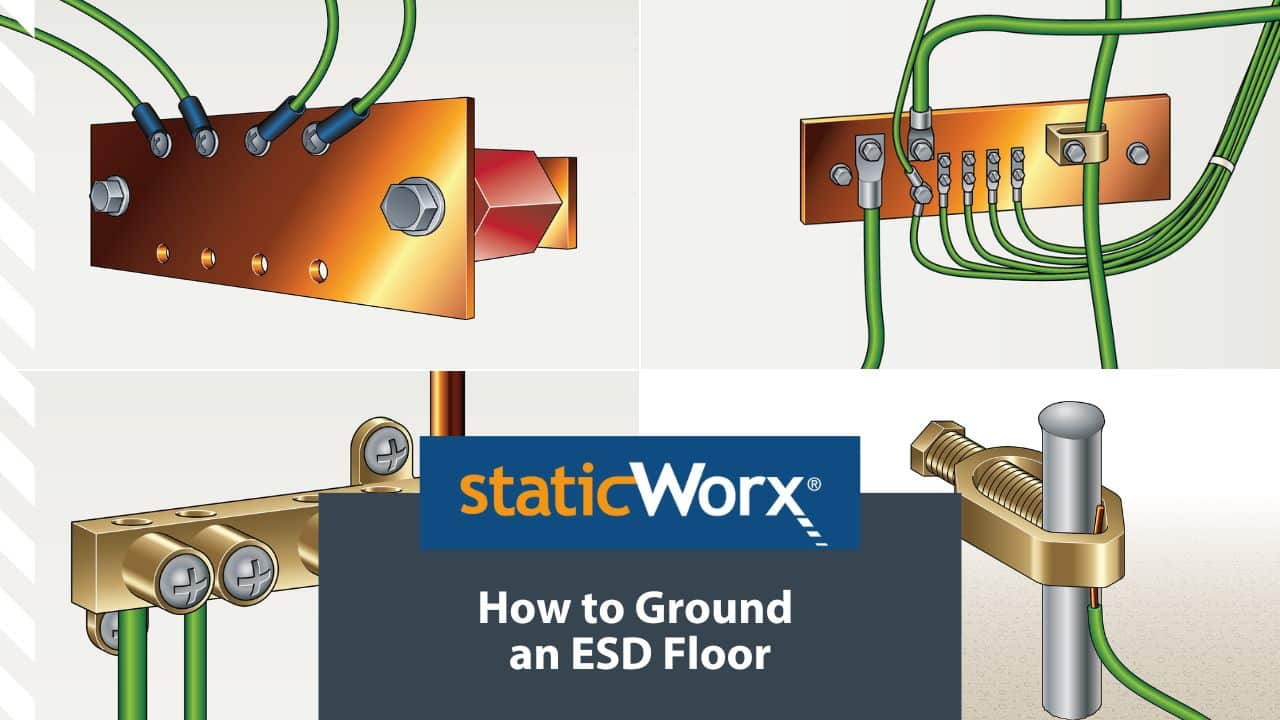
How to Ground an ESD Floor
How to ground an ESD floor.
Grounding an ESD floor is straightforward and easy. Conductive adhesive eliminates the need for expensive copper equipotential grounding grids of the past. The conductive adhesive is linked to ground with copper connector straps placed at the perimeters of the room. The straps, usually about 24″ long, can be attached to electrical outlets, conduit, building steel, or a dedicated grounding bar. Only one connection is necessary for every 1000 square feet of contiguous ESD flooring.
Grounding method 1, easiest. Grounding an ESD electrical outlet. Grounding conductive and static-dissipative tile and sheet flooring to an AC electrical outlet is the easiest and most common grounding method. Caution: Only use electrical receptacles/outlets, that have been previously tested using an approved circuit tester complying with CSA and/or UL standards. Required materials: Screwdriver, 24-inch copper grounding strap, ESD flooring, conductive adhesive. One copper grounding strap should be installed for every 1000 square feet of ESD flooring. Each room should have at least one grounding strap.
Step 1, remove center screw on cover of AC electrical outlet using a screwdriver.
Step 2, locate and remove grounding screw inside AC electrical outlet.
Step 3, punch small hole in 24-inch copper grounding strap, provided with Staticworx ESD flooring. The hole should be smaller than the head of the screw removed in step 2.
Step 4, secure copper straps to the AC electrical outlet with the same screw removed in step 2.
Step 5, allow 24-inch copper strap to run down the wall to the subfloor, concrete, et cetera. Fold copper at a 90-degree angle at the point where the wall meets the floor. Lay remainder of copper strap flat on the subfloor. The strap can be placed directly on the concrete subfloor in advance of installation or pressed into the conductive adhesive during installation. At least six inches of copper should contact the floor. If the copper is applied directly to bare concrete or another subfloor, it will need to be covered with conductive adhesive during the installation.
Step 6, cover copper strap on floor with conductive adhesive and new flooring material. For a cleaner installation, copper should be covered by wall base.
Step 7, finish installation by reattaching AC outlet cover with screw removed in step 1.
Any electrical outlet can be tested using a ground plug tester. A ground plug adapter is equipped with three indicating lights. The only indication that is acceptable for the ground plug adapter to be in use is with the two outer “CIRCUIT OK” lights energized, i.e lights one and three on, light two off. If any other condition exists, do not use the receptacle or the ground plug adapter until tested and approved by a qualified electrician.
Examples of wiring defects include, but are not limited to the conditions described below.
1. Open ground wire: the equipment grounding conductor is not complete.
2. Reverse polarity: the hotter neutral circuit conductors are reversed.
3. Open hot wire: the hot circuit conductor is open from a blown fuse, tripped circuit breaker, switch off, broken wire, et cetera.
4. Open neutral wire: the neutral circuit conductor is open.
5. Hot and ground reversed: the hot circuit conductor and the grounding conductor are reversed.
6. Hot on neutral and hot open: the hot circuit conductor is connected to neutral terminal and the hot terminal is unwired. Alternative grounding methods.
Grounding method 2. Grounding to a natural earth ground. If the floor will be installed on-grade or below grade, a copper grounding rod can be driven into the ground creating an earth ground for the floor.
Step 1, drive the four to six foot rod into the ground until only two or three inches of the rod remains exposed.
Step 2, attach the copper-grounding strap to the exposed end of the rod using a grounding clamp, usually sourced from the same manufacturer as the grounding rod. Refer to www.stormgrounding.com. If necessary a number 10 or number 12 wire can be attached to the grounding rod.
Step 3, run the wire from the rod to the grounding strap and tie it to the strap with a wire nut.
Grounding method 3. Ground to an earth ground. If the building is constructed with exposed steel support columns, the copper grounding strap can be attached directly to one or more of the columns.
Step 1, affix the grounding strap to the tile as previously described.
Step 2, drill a hole in the support column.
Step 3, with a grounding screw or clamp attach the end of the copper strap directly to the column or mount a grounding clamp to the column and use it to clamp the copper strap. Copper grounding straps should be attached to aluminum studs using sheet metal screws and a washer.
Step 4, a continuity test should be conducted with a volt ohm meter to confirm a compliant electrical ground connection between the copper strap and electrical ground. Copper bus bars can serve as dedicated common point ESD flooring ground connection. Copper ground straps may also be adhered to structural I-beams. Note, the beams must be bare metal. Paints and coatings must be removed from beams prior to attaching copper straps.
StaticWorx produces a static-control flooring products that protect sensitive electronic components from harm caused by electrostatic discharge . To learn more about preventing static electricity, call or visit our website.
StaticWorx. We keep you grounded.

