Learn the differences between ESD solid vinyl tile and interlocking ESD tile. The post compares specs, installation, maintenance and intangibles.

Why Savvy Buyers Qualify Their ESD Floor – and Why You Should Too
12 min read
You’re constructing a new facility, covering an old floor as part of a renovation project, or repurposing a workspace, and need to install a floor with ESD protection. You’re smart; you’ve done the research. To comply with the personnel grounding parameters in the 2014 version of ANSI/ESD S20.20, the ESD standard for electronics manufacturing and handling facilities, you know the floor must have an electrical resistance measurement no greater than 1.0 x 10E9 ohms, and it must generate no more than 100 volts in a walking body voltage test.
Because you want a floor with a clean, hospital-like shine, you’ve settled on ESD vinyl. The supplier you’ve chosen has given you a spec sheet stating that the floor meets ANSI/ESD S20.20 and you’ve done your own resistance and walking body voltage tests on site.
You’ve covered your bases. Right?
Not necessarily.
First, spec sheets don’t always tell the whole story. Many manufacturers do resistance testing in house (and some ignore body voltage testing altogether). These resistance tests may not be performed rigorously, according to the standard test method outlined in S20.20, may not be done in the required 12% humidity-controlled environment, and the test subject may or may not have worn all the various types of footwear that will be worn in your facility.
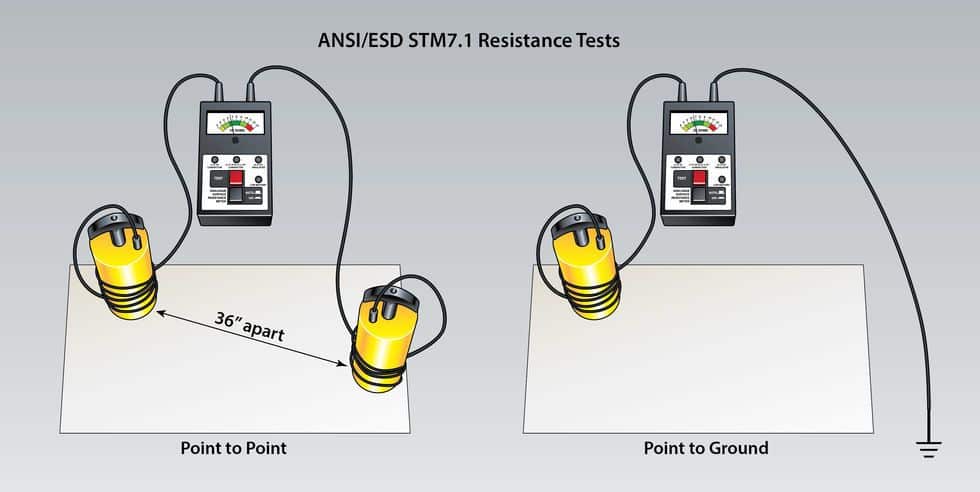
Why Do These Tests Matter?
Let’s take a hypothetical example: Suppose you lay a highly conductive copper tile on a highly insulative sheet of plastic. You decide first to measure point to ground resistance (Rtg). In this scenario, there is no ground connection – that is, despite its being highly conductive, when laid over plastic the copper tile cannot be grounded. To measure resistance to ground, you’d create a ground connection by attaching one end of a ground cord to the copper tile with an alligator clip, the other end to some sort of ground point – an electrical outlet, for instance. Let’s say the ground cord, like a wrist strap, has an electrical resistance of 1 megohm (1.0 x 10E6) to ground.
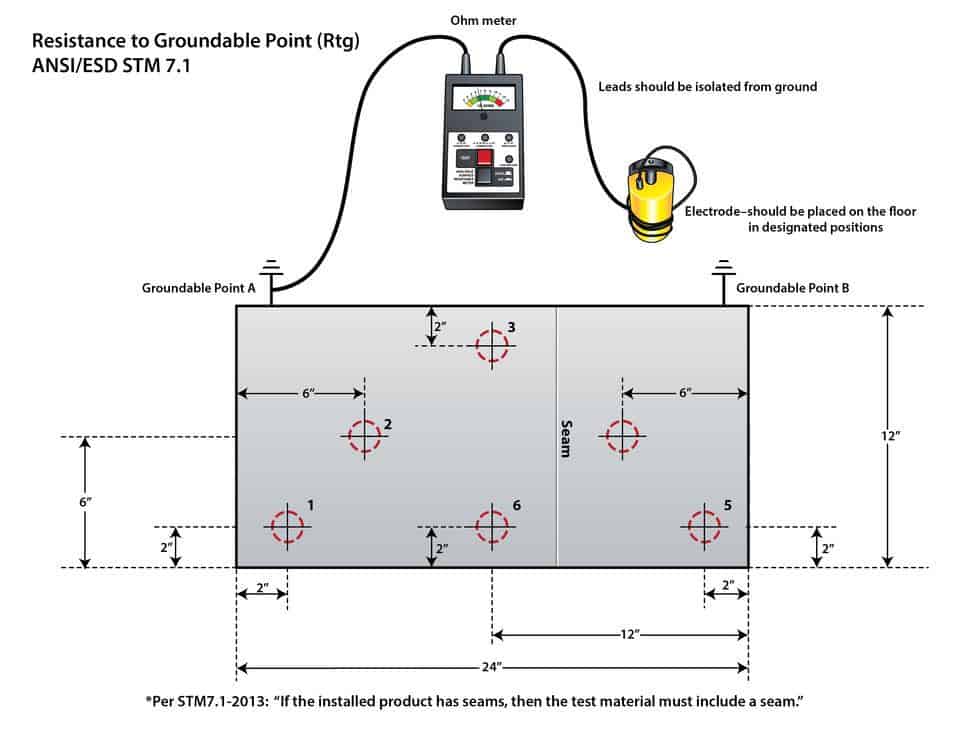
Next you place a five-pound weight on the copper tile and another weight on the ground cord. Basic physics tells us that circuit resistance can never be lower than the resistance of the most resistive element in the chain, in this case the ground cord with the 1 megohm resistor. In this setup, the resulting point to ground (Rtg) resistance of the circuit will be 1 megohm, which meets the ESDA definition of a static-dissipative floor material (≤ 1.0 x 10E9).
Electrical Pathway: Safety Considerations
Suppose, as STM 7.1 requires, you also measure point to point resistance (Rtt) – that is, the tile’s surface resistance, measured within a single tile and also across a seam, from one copper tile to another. Performing the test using both variables can help determine the grounded pathway – whether electrical charges will move across the floor/across seams or through the thickness of the floor. Without testing both ways, it’s impossible to know what might happen if the surface of the floor were to become grounded by contact with grounded equipment.
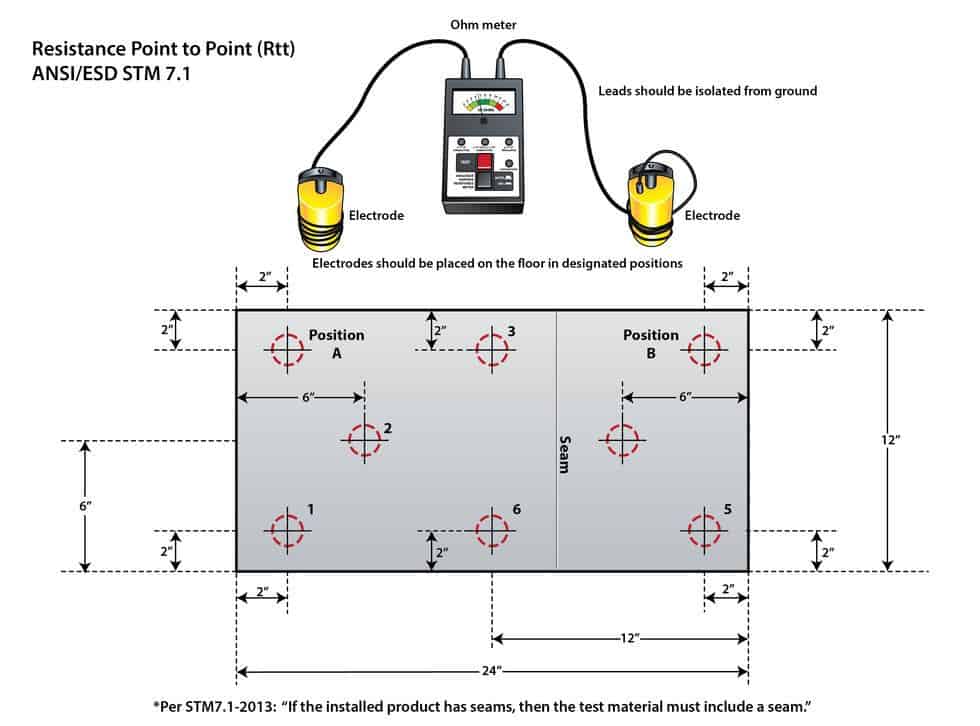
To perform this test it is not necessary to ground the tiles, so there would be no need for the ground cord or 1 megohm resistor. Without the resistor, you’ll get a measurement that’s much lower, quite likely below 2.5 x 10E4, the lowest resistance permitted – for safety reasons – by any standards organization.


Keep in mind that 1.0 x 10E6 is the minimum recommended resistance in the telecom industry, FAA, 9-1-1 dispatch, and Army Corps of Engineers, for use in areas where personnel will be in contact with electrified equipment.* In electronics manufacturing facilities, because people typically wear ESD-protective shoes with built-in resistors that are tested every shift, this may not be an issue – unless, that is, there’s ever an electrical short or ground loop in the building, while people are walking on the highly conductive floor and not wearing shoes with built-in resistance.
In this case, according to repeated independent lab tests, resistance below 1.0 x 10E5 might create a safety hazard. (Note: 10E5 = 100,000 ohms is four times higher than 2.5 x 10E4 or 25,000 ohms – as illustrated in the example above and as is common in conductive flooring materials.)
- Standards for many industries prohibit the use of floors with resistance below 1.0 x 10E6. Standards include: Motorola R56, for 9-1-1 dispatch facilities; ATIS-0600321, for telecommunications rooms; FAA STD 019f, for flight-control applications; and Army Corps of Engineers UFGS 09 62 38, for static-control flooring in government facilities.

So there are practical considerations – safety issues – to evaluate as part of this process. The point is, it matters – a lot – which tests are performed and how those tests are conducted.
But I tested the floor myself. Isn’t that good enough?
Maybe. Or maybe not.
The same methods must be used when you test the floor yourself, in your own facility. Prior to conducting resistance and body voltage tests, the floor should be conditioned for at least 48 hours in an environmentally controlled chamber at 12% humidity. Humidity can alter the performance of an ESD floor; conditioning removes that variable from the equation.
Tests should always be performed according to the test methods for qualification of ESD floors, outlined in ESD S20.20. To ensure that the floor will perform to standard, it’s crucial that resistance and body voltage tests are performed exactly as indicated in the standard test method.
It’s also crucial that the tests be performed with every type of footwear that may be used in the space. Toe straps, for instance, perform differently than ESD shoes – and often yield inferior test measurements. In fact, many types of floors – urethane (PU) coated vinyl, for example – will not protect against ESD damage unless people in the space wear conductive ESD shoes.
Ideally, to ensure tests are performed objectively and according to the prescribed test methods, all static-free floors should be tested by an independent, third-party lab. Labs have no stake in the outcome of the tests; they document results exactly as measured—without prejudice as to whether the flooring meets the specified standards or not.
If a manufacturer gives you test results – or test results appear on a spec sheet – rather than assuming the tests were performed properly and accepting the results at face value, it’s smart to ask questions.
Never accept ESD test results at face value. Always ask questions:
- How was the test performed?
- Were tests performed in house or by a third-party, objective lab? If a lab, which lab?
- Is the raw data available?
- Were test samples conditioned and tested in a humidity-controlled chamber per the test method?
- How many and which types of ESD footwear were utilized for the S97.2 body voltage testing?
- Was the flooring tested with heel and toe straps as well as ESD shoes?
Once you’ve properly qualified your chosen floor or narrowed your choices to a few properly qualified floors, then, and only then, it is time to evaluate the materials based on how they’ll perform in your environment. Again, this is the time to ask questions:
Is the environment dirty or clean?
Built-up dust and dirt can affect the ESD properties of some floors, particularly those with a lower concentration of conductive material on the surface. Vinyl, for instance, can measure in the conductive range, but because the base material is insulative (static generating PVC) and the conductive particles are not distributed contiguously across the tile surface, a layer of dust and dirt on the floor could prevent contact with a conductive heel or toe strap, rendering the floor less effective.
That’s not to say vinyl is a poor ESD flooring choice, but it does mean that any conductive floor that relies on contact between ESD footwear and randomly-dispersed conductive particles on the surface may require excessively frequent maintenance to eliminate dust and dirt from impacting the readings. When regular cleaning cannot be reasonably assumed, it may make sense to consider a different type of flooring material.
Will people be using chemicals or soldering equipment?
If so, ESD epoxy, which is generally impervious to damage from solder or chemicals, may be the optimal choice. On the other hand, epoxy surfaces can be loud and noise will echo across the room. If noise attenuation is an objective, ESD rubber may be a better option.
Is ergonomics or slip-resistance important?
If so, flooring materials like extreme-duty carpet tiles and rubber, designed with ergonomics in mind, may be the best options. Carpet with a non-directional design will greatly minimize wear patterns and tiles made with mergeable yarns are easily replaced without worry about color matching or dye lots.
Every ESD flooring material has benefits and drawbacks.
If you’re getting the idea that each flooring material has its own set of benefits and drawbacks, bravo! You’re absolutely right! In fact, an ESD floor that performs well in one environment can fail miserably in another. The only way to be sure you’re choosing the right floor for your application and environment is to consider every scenario and be sure you ask all the right questions.
Before even thinking about how a material will perform in your environment, be sure you’ve qualified the floor, following the qualification procedure outlined in ANSI/ESD S20.20. Unless an ESD floor has been properly tested, ideally by an independent lab, following test methods to the letter, it is not safe to assume it will perform properly after it’s installed.
You’re smart. You’re prepared. You do your homework. To be sure you end up with the ESD floor you purchased, you have to be smarter and better prepared – by ensuring, before selecting or purchasing a ESD floor, that the floor has been properly qualified.
About StaticWorx, Inc
All StaticWorx posts are written by our technical team and based on industry standards and specifications, test data, independent lab reports and other verifiable data. We provide ESD training and offer CEU credits to architects. If you’re interested in an ESD training session or architects’ ESD workshop, give us a call: 617-923-2000.
Get in Touch
The form below will help us better understand your needs and get you as quickly as possible to the right person. We look forward to helping you solve your static problem!
You can expect a response within 24 hours. For faster service, please give us a call: 617-923-2000
"*" indicates required fields
Visit our privacy policy to find out how we process data.
More Blog Posts
To maintain performance, ESD floors require specially formulated products. We offer tips on what to consider when choosing cleaning supplies.
Static-dissipative floors transport harmful static charges to ground. Dissipative is also a term for flooring with a specific, measurable electrical resistance.
StaticWorx recognized as one of the fastest growing private companies in the U.S. 2023 marks StaticWorx fourth appearance on Inc. 5000 list.
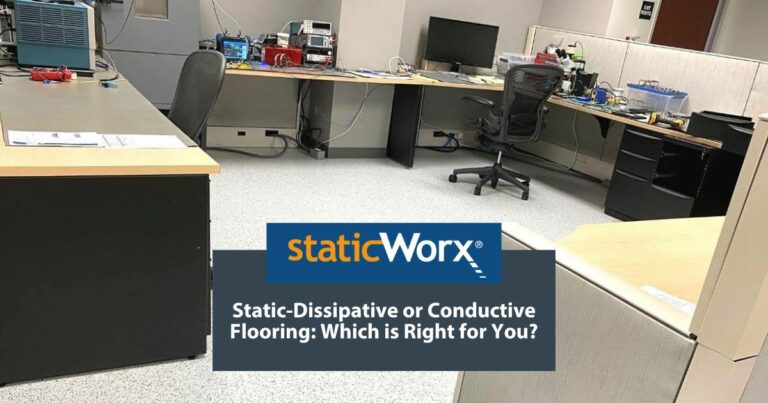
Conductive and dissipative flooring protect electronics by transporting charges to ground, conductive at a quicker rate, dissipative slower & more controlled.
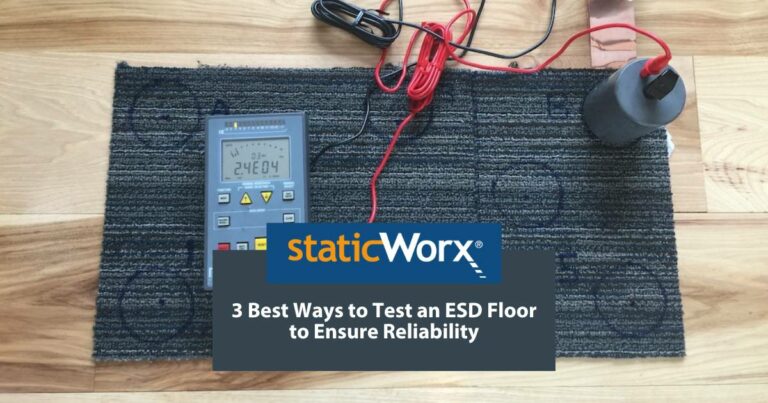
We explain the 3 main ways to test an ESD floor: Electrical resistance; body voltage & ESD audits, with advantages and reasons for each.
Three critical factors—application, industry standards & footwear—help you choose the best ESD floor, while ensuring the safety & efficiency of your operations.
StaticWorx Founder and President Dave Long shares three of his recommended reads: Quit, How to Change, and The Goal.
There are leadership qualities StaticWorx strives to embody every day, with every product, throughout each project.
No matter how you slice and dice a project, an ESD floor is a major investment. This blog post examines five ways to keep undue costs down.
What’s the difference between static control and static resistant? Or anti-static flooring? Find out more in our blog post.
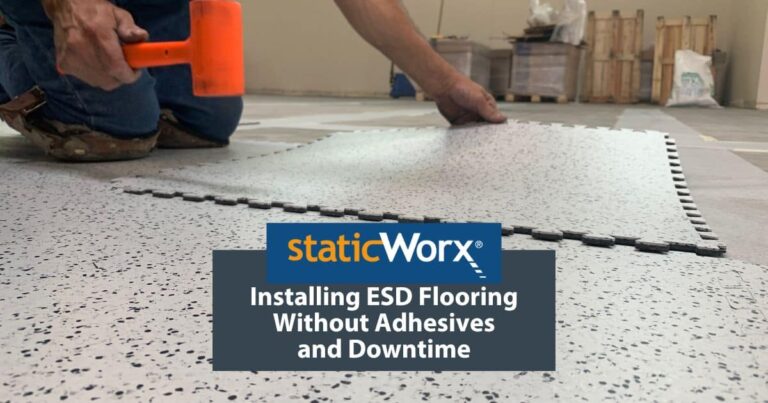
A major part of any ESD control program is getting proper flooring in place. How can one replace a floor without generating any debris? Learn more.
A well-designed, comprehensive, fully realized program is a must for manufacturers serious about ESD control. Learn why ESD programs fail.
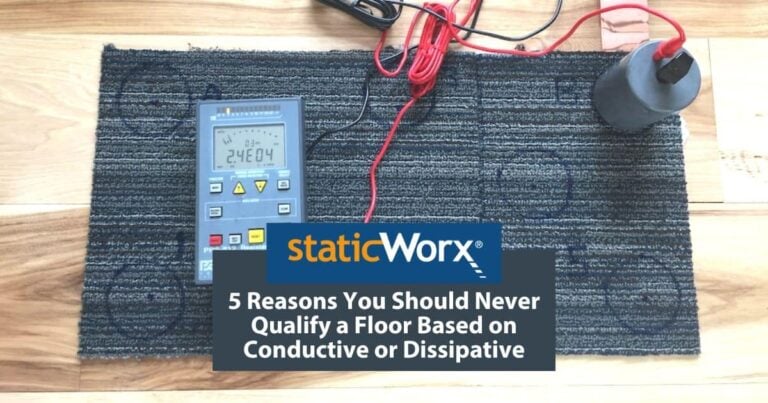
ESD Floors should never be specified based on the descriptive terms conductive or static dissipative. Always base ESD specs on verifiable metrics. Find out why.
To comply with relevant ESD standards, test electrical properties using methods outlined in ESD S20.20. For best results require testing by an independent lab.
If the vapor barrier fails to adhere to the subfloor, tiles will lift. Bond test and manufacturer oversight are crucial to ESD floor installation success.
Blog Post: Conductive and Static-Dissipative Flooring: What’s the Difference?
The Layperson’s Answer
What’s the difference between conductive and static-dissipative flooring? Facts, analogies and images illustrate the difference in easily understood terms.
Qualification is the first step in selecting an ESD floor. Learn how to perform resistance tests to be sure the floor meets electrical & safety standards.
Will bare concrete control static? Learn why concrete floors are unreliable & what precautions to take if you must work on a bare concrete floor.
A look at how the StaticWorx cartoon, 'Conductive Flooring Does Not Mean Antistatic Flooring,' was conceived and created.
Learning Center Articles
- ESD Basics
- Installation & Maintenance
- Selecting & Specifying an ESD Floor
- Technical Information
- 7 Common Mistakes Selecting an ESD floor
- A Guide to ESD Flooring Selection
- Avoid Costly Failures: What You Need to Know When Specifying ESD Flooring
- Choosing ESD Flooring for:
- ESD Footwear: What Is It and When Is It Necessary?
- ESD Footwear for Electronics Manufacturing and Handling Applications
- Facility Managers’ Guide to Selecting ESD Flooring
- The Need for Due Diligence in Specifying Static-Free Flooring
- Standard of Care for Specifying Floors in Mission-Critical Spaces
- Understanding the Hidden Costs of ESD Flooring

StaticWorx high-performance static-control floors protect electronic components, explosives, and high-speed computers from damage caused by static electricity. ESD flooring is part of a system. Choices should always be based on objective, researched evidence. When you partner with us, we look at all possible items that may need to integrate with the floor, and, focusing on your goals and objectives, help you find the right floor for your application.


